Playbooks start with a Trigger action and end with an End action. In between, you can create any of the following actions:
Action Name |
Description |
When to Use/How to Use |
|---|---|---|
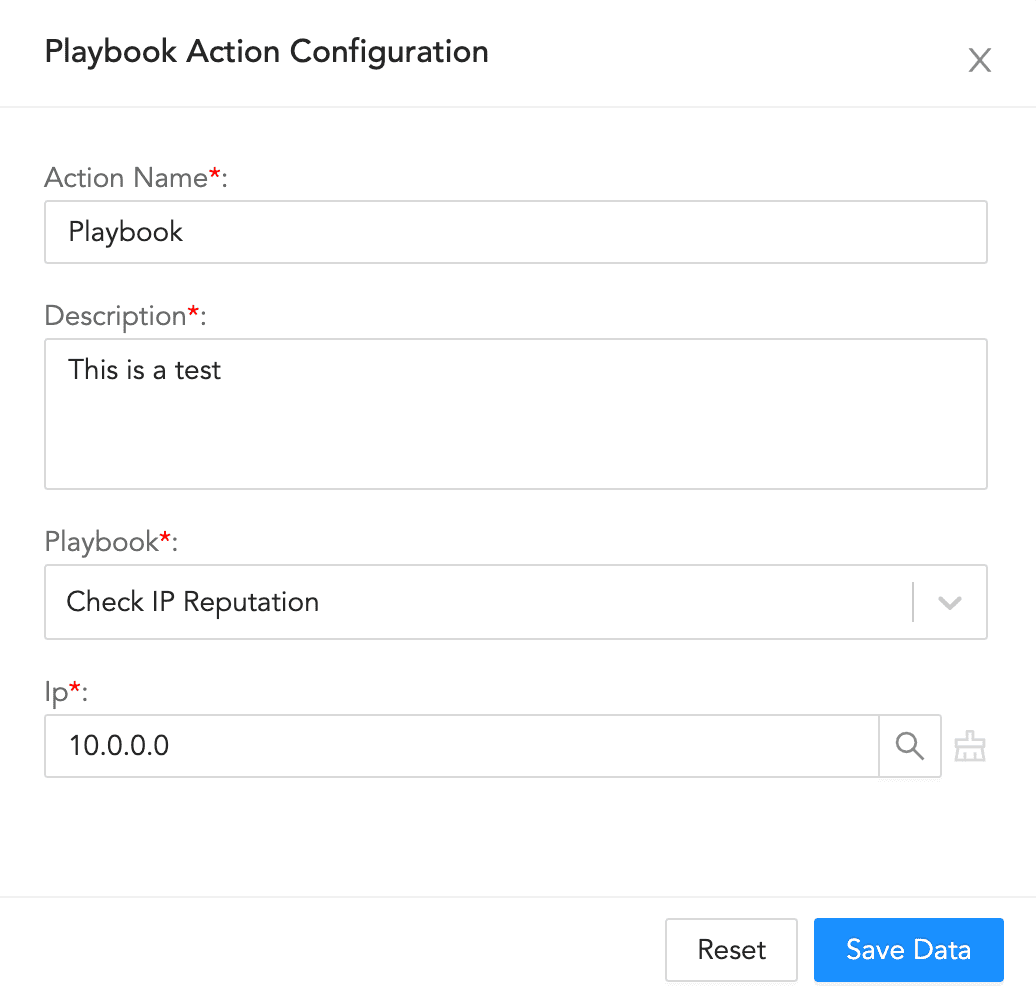
Playbook |
Triggers a different playbook from within the current or parent playbook. |
For longer processes that playbooks automate, it can be helpful to break up the processes into parts. This will help you reuse different playbooks in different scenarios. |
Annotation |
Adds comments to a playbook action. |
Let your colleagues know important information about the Action and Playbook. |
API |
Triggers an API call from within the playbook. |
Connects the playbook to products and services from other vendors. |
Script |
Triggers a script from within the playbook. Currently, LogPoint only supports Python scripts. |
Lets you write python scripts to customize playbook functionality. |
Case Item |
Adds an individual item or event to a case, the investigation’s sequence of steps. Refer to the Cases section for details. |
Let’s you and your colleagues track and understand what happened through the course of an automated incident investigation. |
Status |
Sets the status of an incident. |
Apply status to incidents based on severity. |
Sends an email from within the playbook. |
Send incident based email to desired recipients from within the playbooks. |
|
LDAP |
Triggers an LDAP request. |
Authenticates users/actions from within Playbooks by communicating with a central user database. |
To configure a playbook action:
Enter an Action Name and its Description.
Select a Playbook.
Enter the information for the playbook.
Click Save Data.
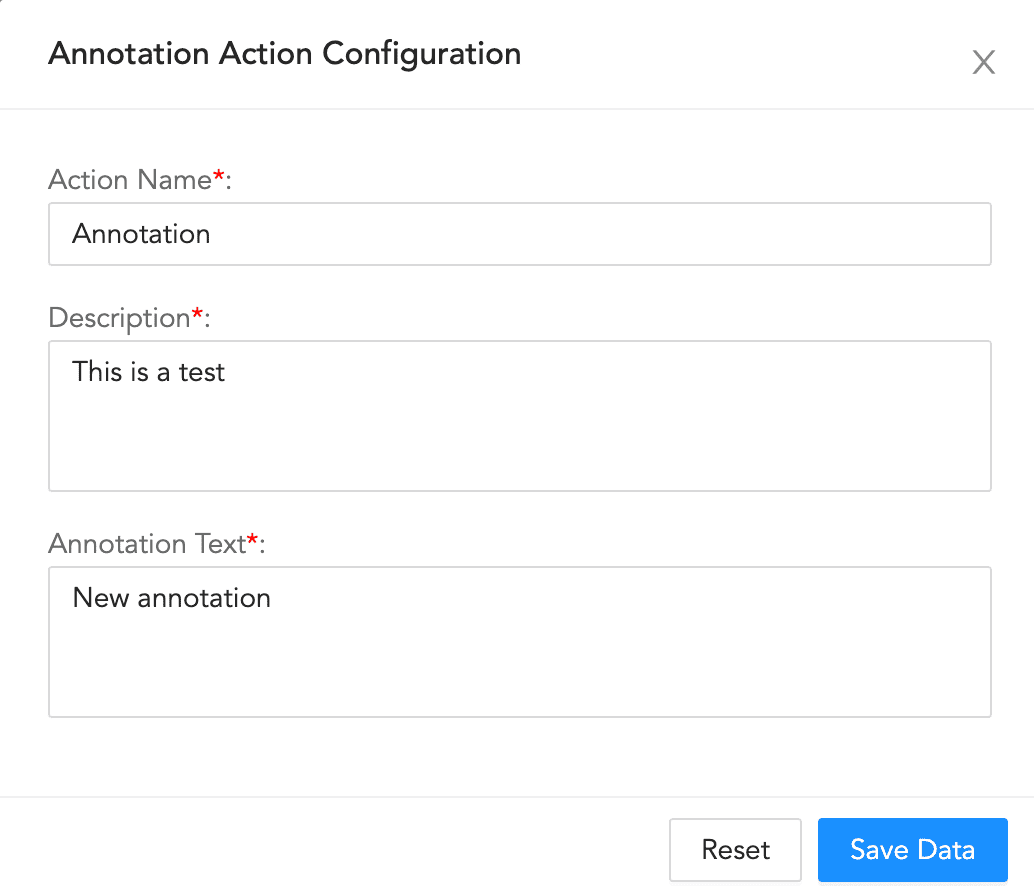
To configure an annotation action:
Enter an Action Name and its Description.
Enter an Annotation Text.
Click Save Data.
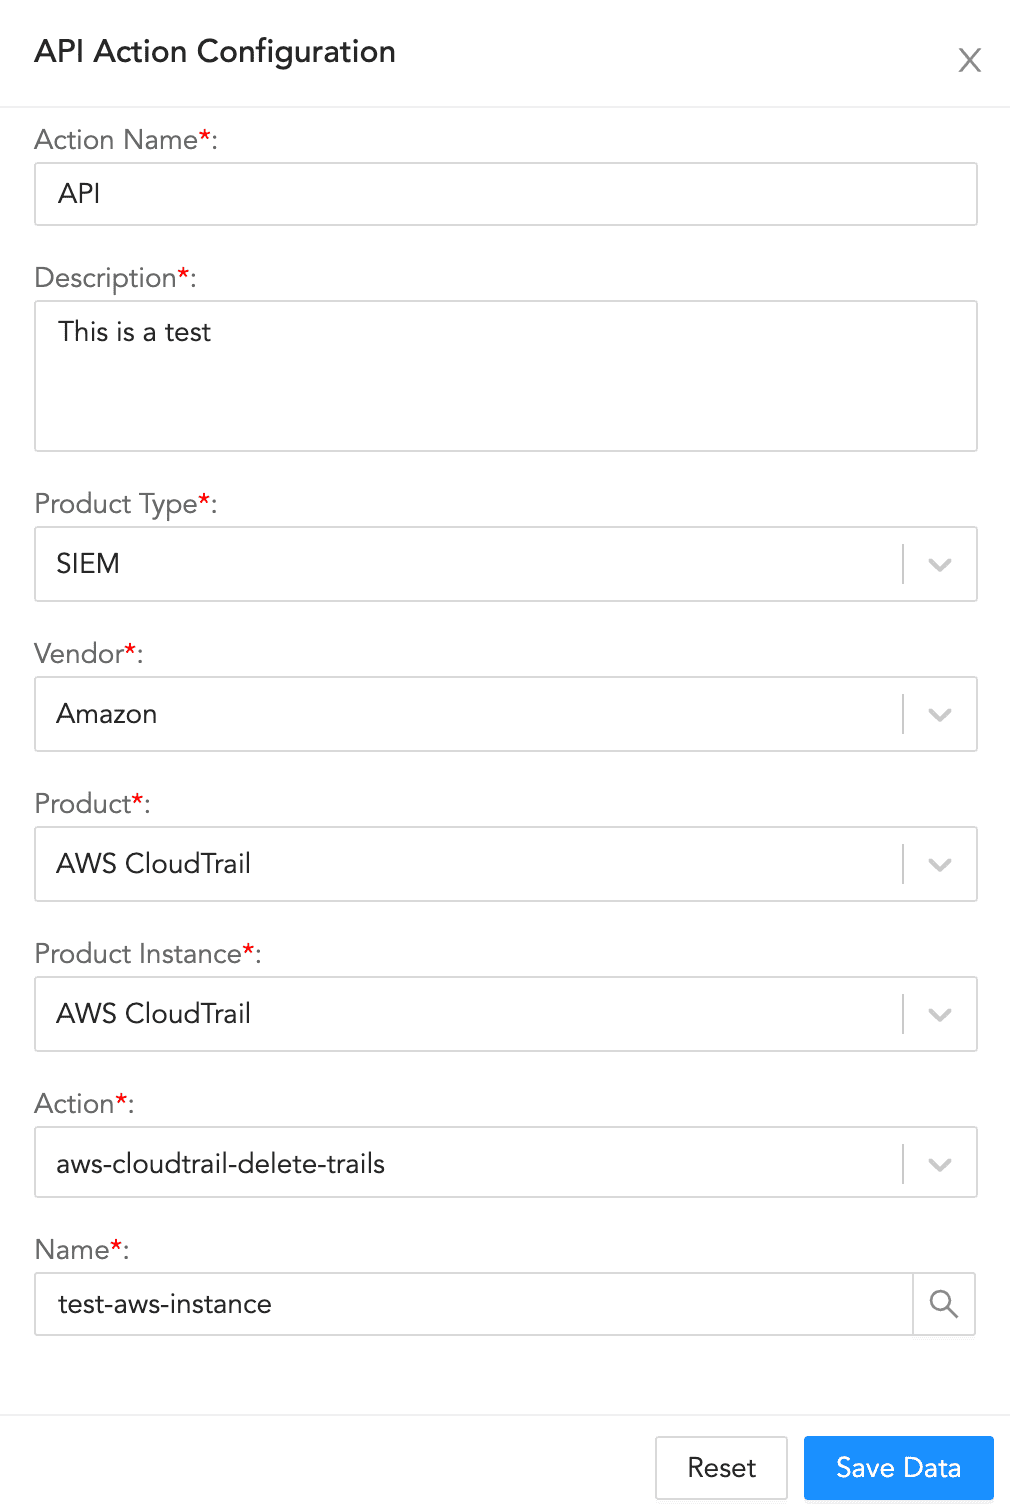
API Action Configuration
To configure an API action:
Enter an Action Name and its Description.
Select a Product Type, a Vendor, a Product, a Product Instance, and an Action.
Enter the information for the selected configuration.
Click Save Data.
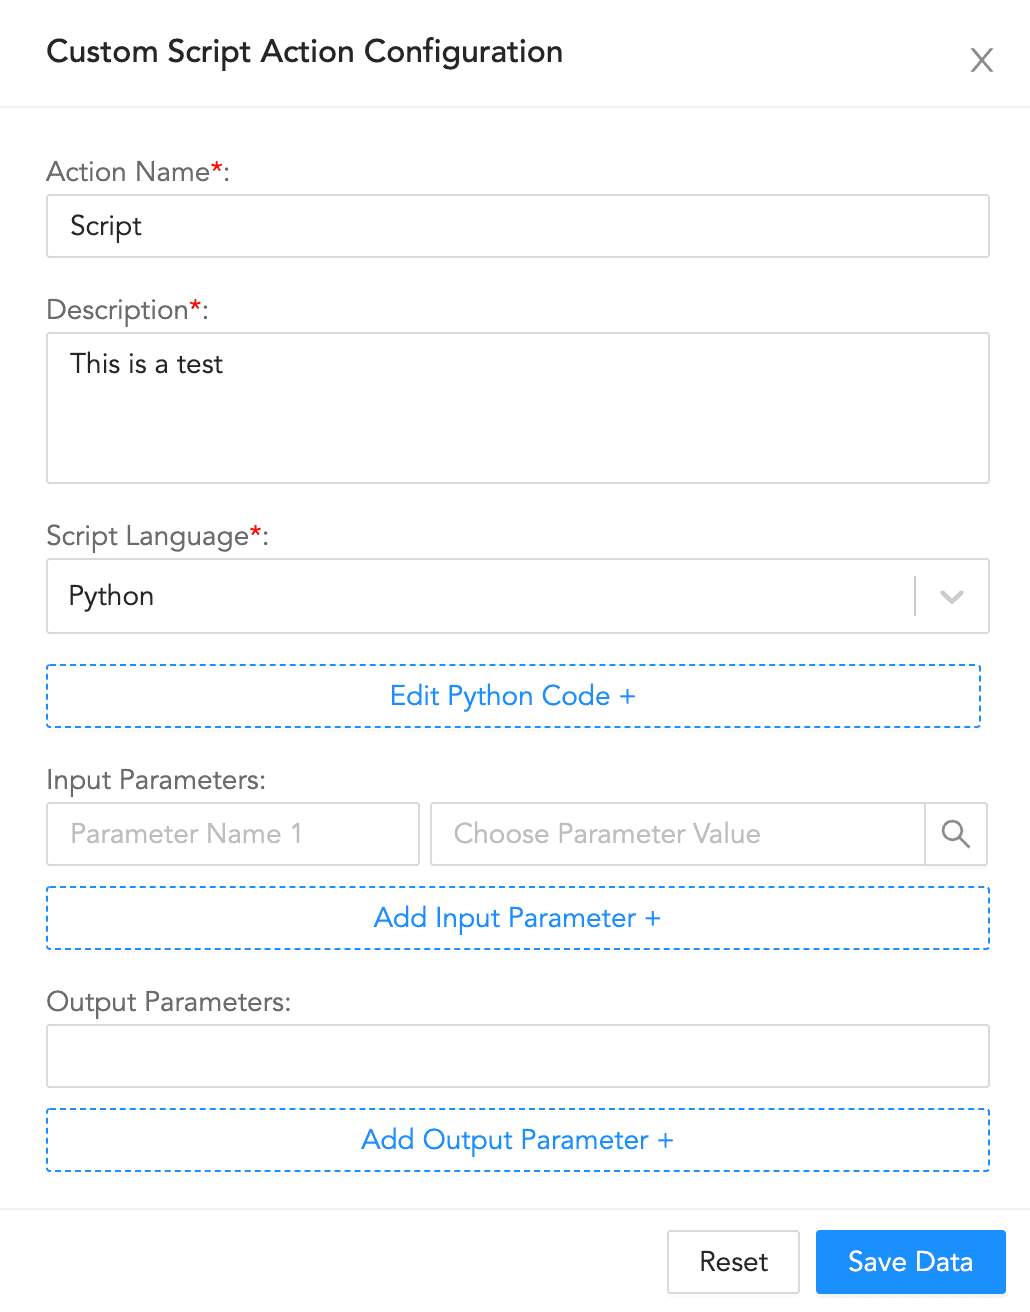
Script Action Configuration
To configure a script action:
Enter an Action Name and its Description.
Select the Script Language.
Click Edit Python Code +, enter the required code, and click Save.
Enter or select the Input Parameters and their values.
Enter the Output Parameters for the block.
Click Save Data.
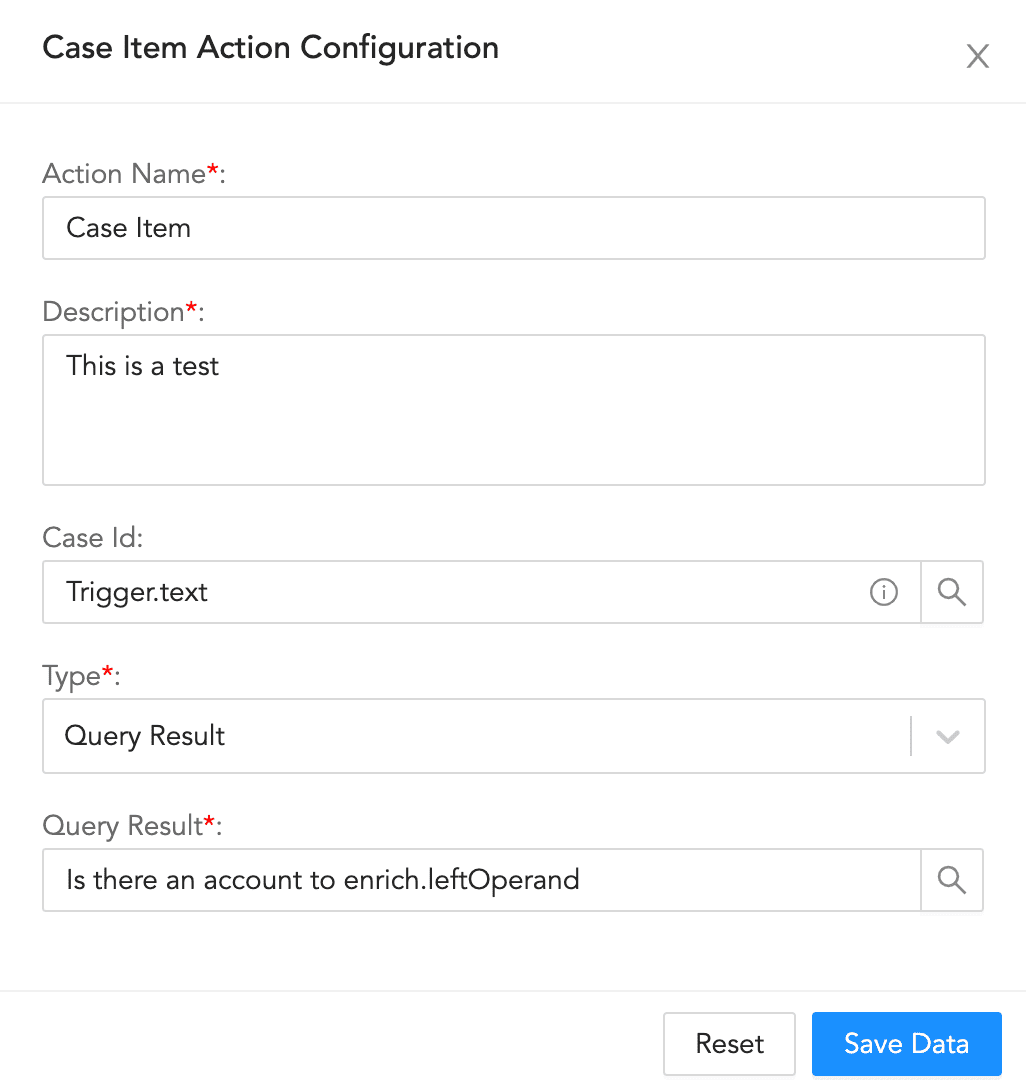
Case Item Configuration
To configure a case item action:
Enter an Action Name and its Description.
Enter or select a Case Id.
Select a block Type.
If you choose Label, enter a Description and a Label.
If you choose File, enter a Description, a File Name, and a File Location.
If you choose Query Result, enter a Description, and a Query Result.
Click Save Data.
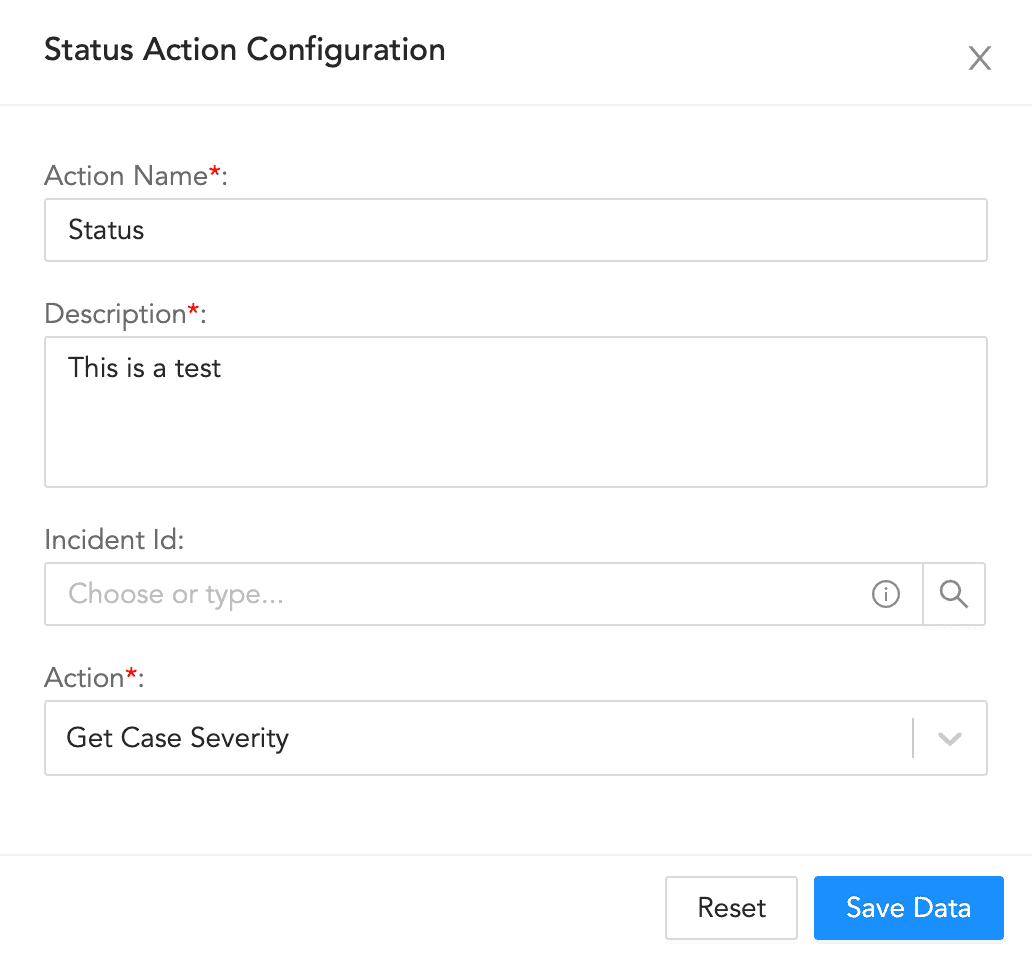
Status Action Configuration
To configure a status action:
Enter an Action Name and its Description.
Enter or select an Incident Id. You can leave the field blank to use a dynamically generated ID.
Select an Action.
If you select Set Case Status, select the Status.
If you select Handling Status, select the Case Status.
If you select Manage Case Severity, select the Severity Action Type and enter the Decrement Severity By value.
Click Save Data.
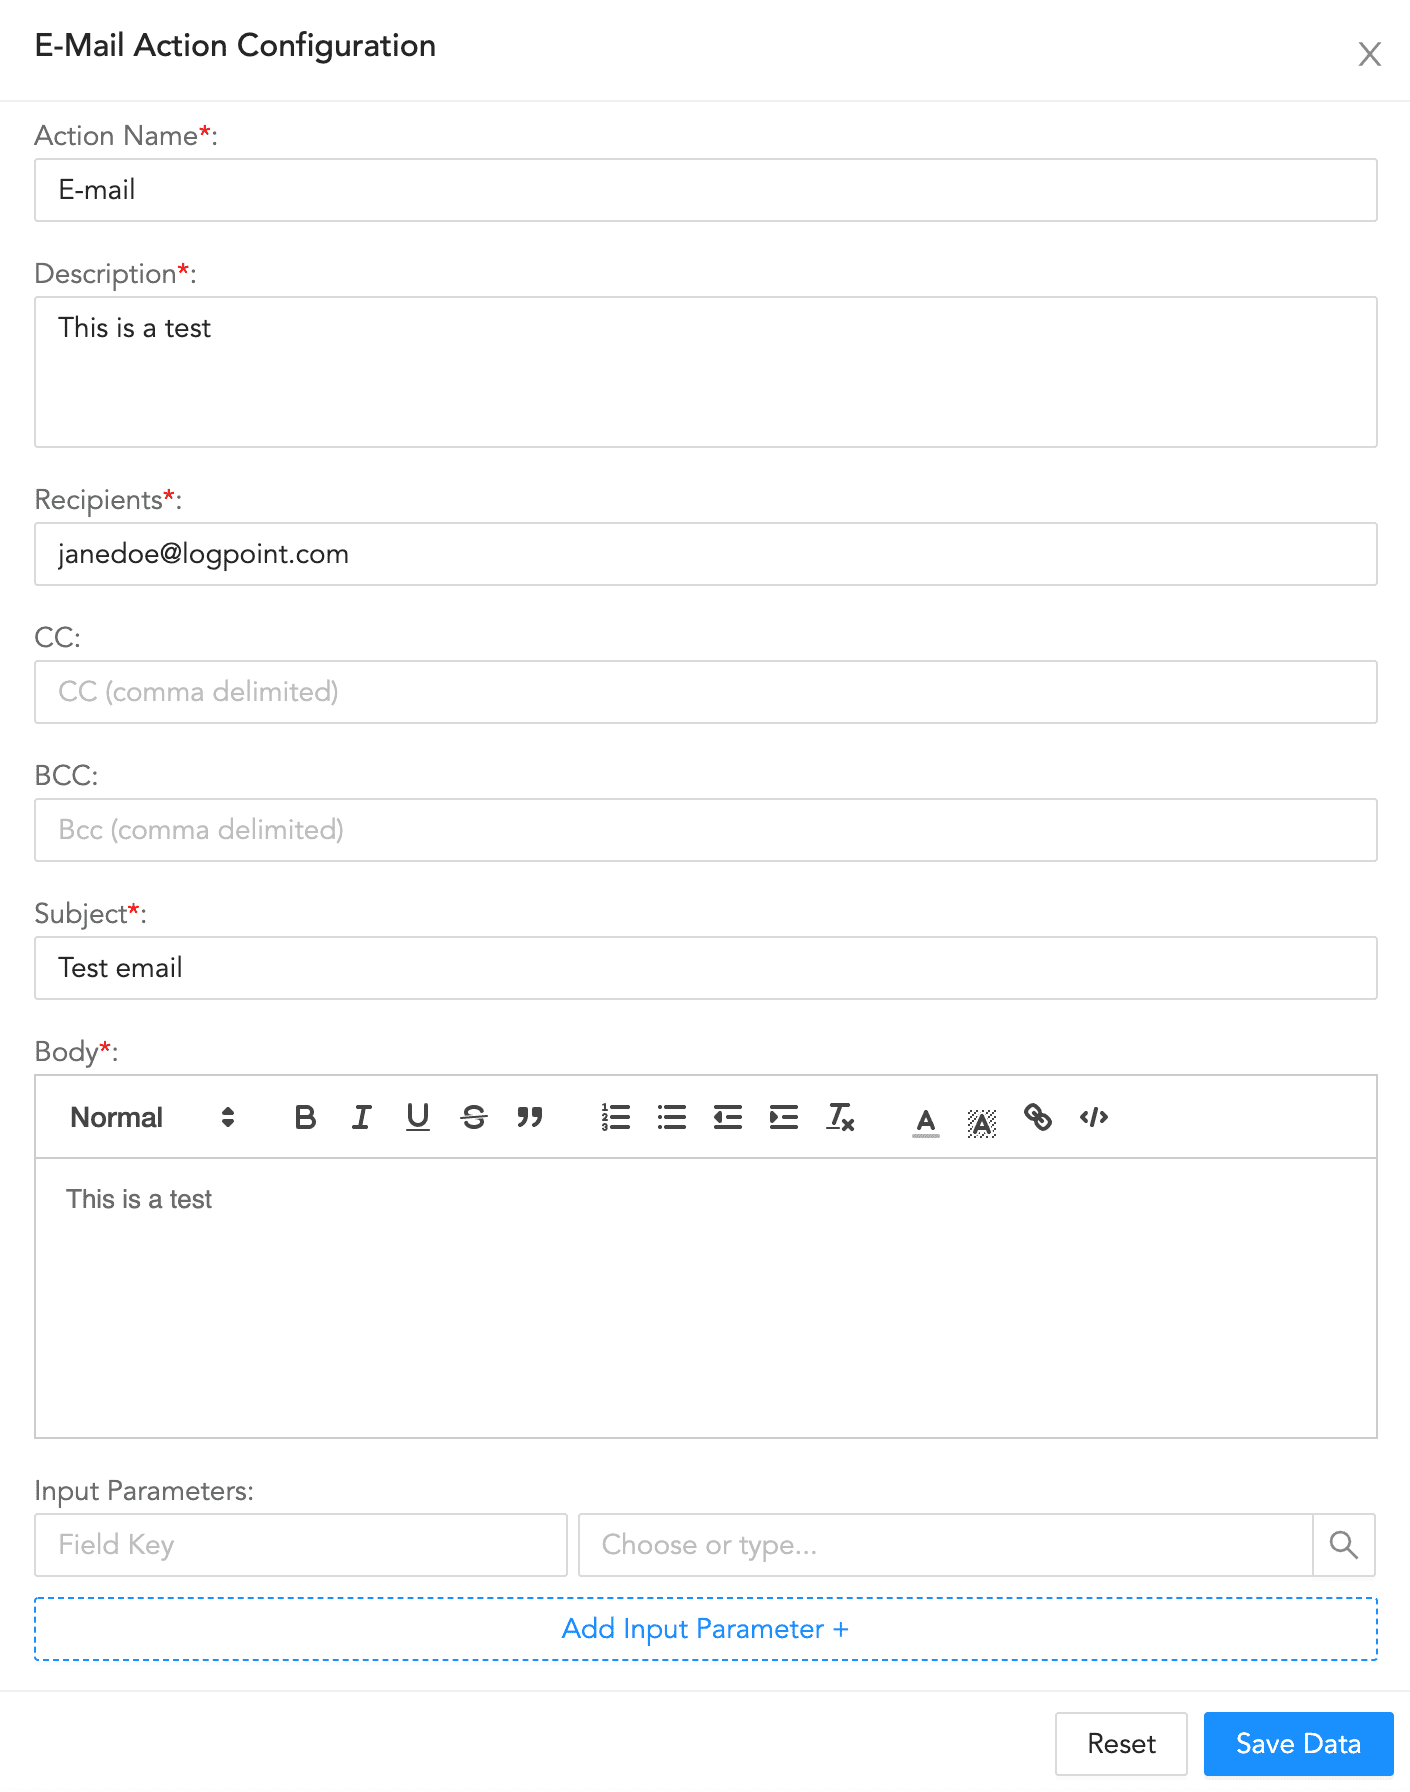
E-mail Action Configuration
To configure an e-mail action:
Enter an Action Name and its Description.
Enter a comma-separated list of Recipients, CC recipients, and BCC recipients.
Enter a Subject.
Enter the e-mail Body.
Enter a key-value separated list of Input Parameters.
Click Save Data.
UML Name |
Description |
When to Use/How to Use |
|---|---|---|
For Each |
Processes multiple queries from the same block. |
When you need to loop queries through each item in an array or list. |
If-Then |
Processes a conditional statement. |
When you need to make a specific response for a predefined event. |
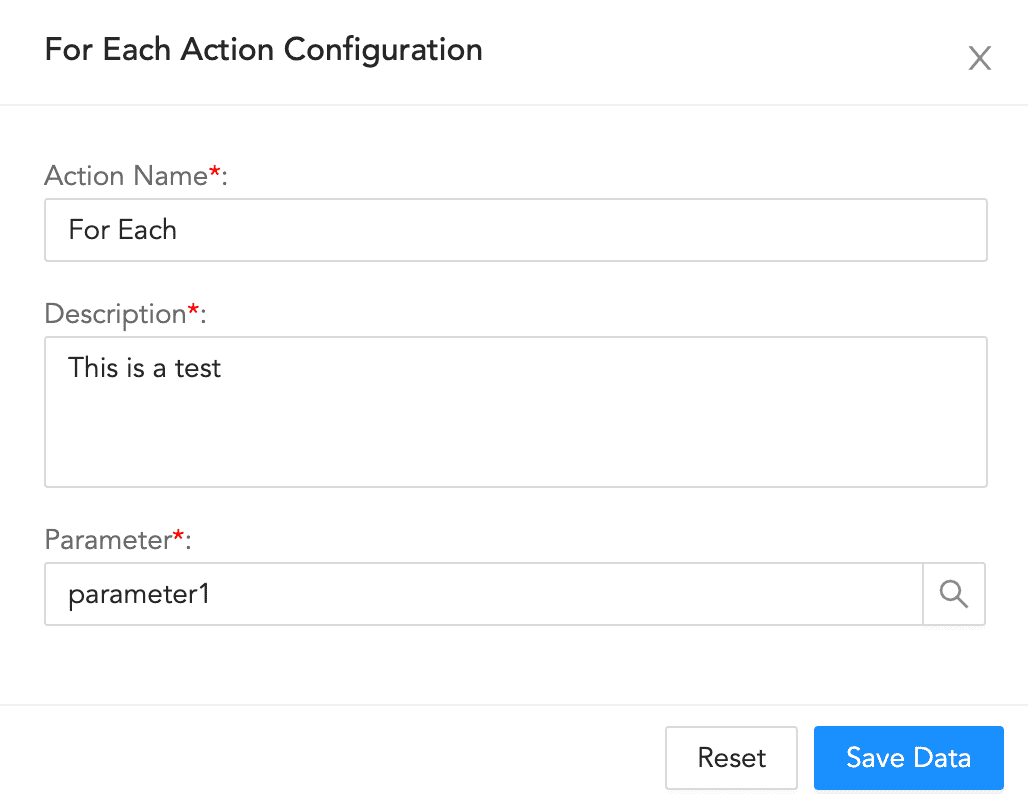
Enter an Action Name and its Description.
Enter or choose the Parameter.
Click Save Data.
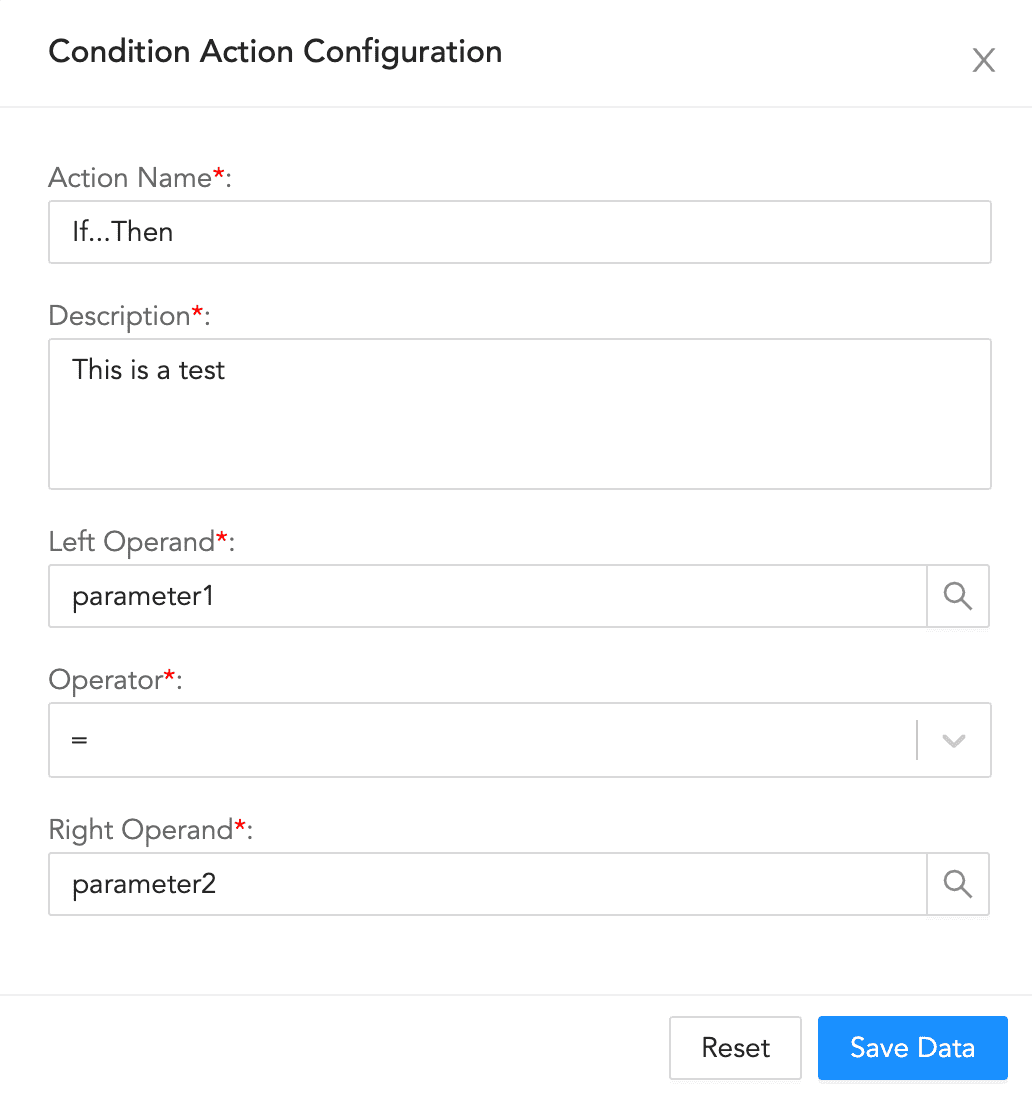
Enter an Action Name and its Description.
Enter or choose the Left Operand.
Select an Operator.
Enter or choose the Right Operand.
Click Save Data.
Note
Add another block to follow from the Else node when the provided condition is False.
Interactive Name |
Description |
When to Use/How to Use |
|---|---|---|
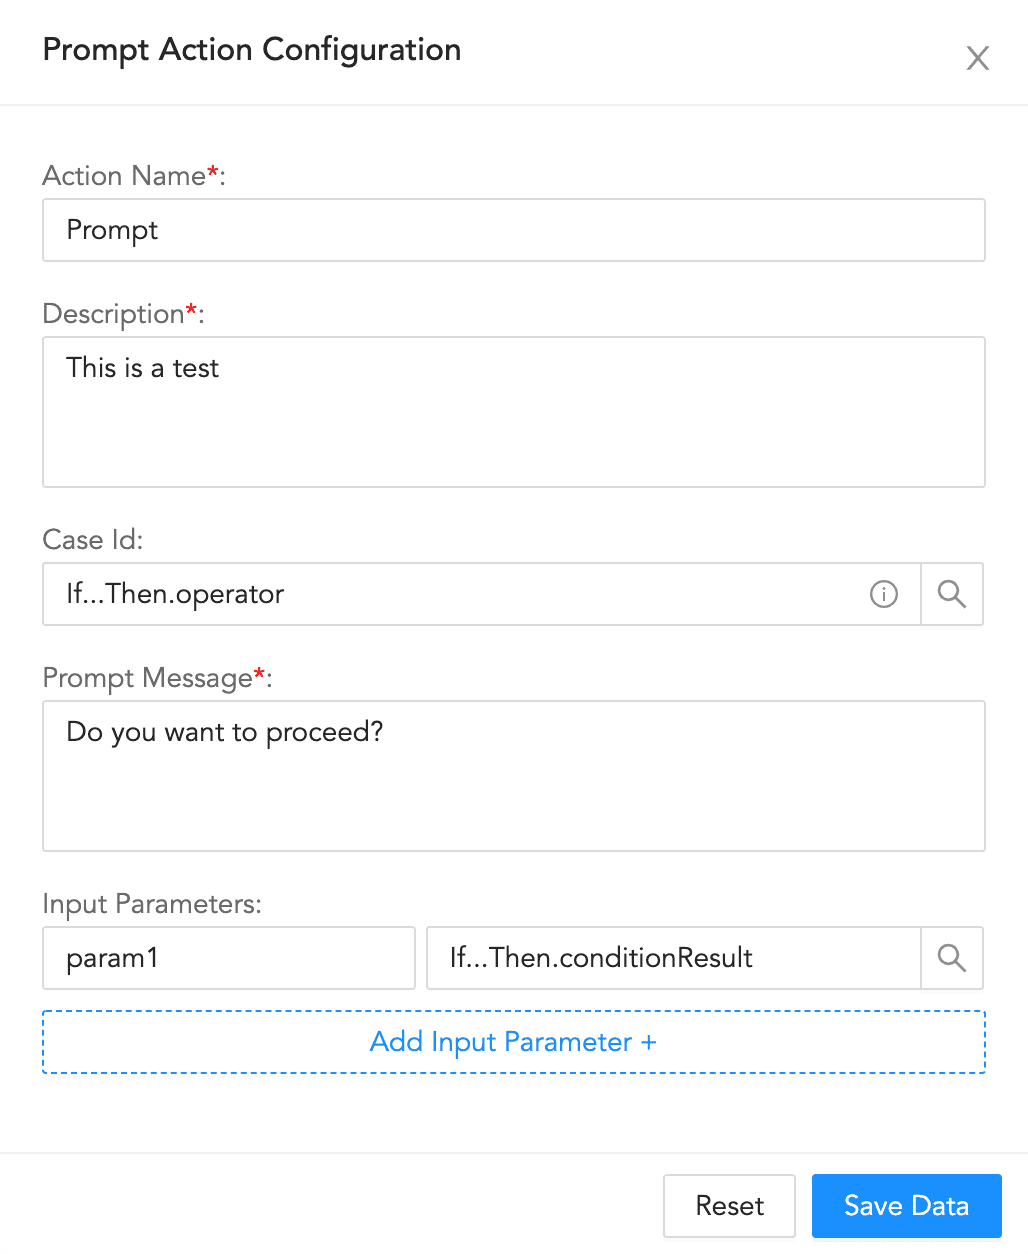
Prompt |
Displays a message for manual action on part of user before the playbook runs. |
When you want to confirm whether or not the user needs to perform certain manual actions before the rest of the automated playbook continues running. |
Action Block Name |
Description |
When to Use/How to Use |
|---|---|---|
Format |
Adds a block of parameters in the key-value format. |
When you need to add multiple parameters and associate each with various actions. |
Query |
Adds a query to get specific fields. |
When you need to input a query to generate output parameters based on input parameters. |
Filter |
Filters results using the input parameters. |
When you need to filter out results based on input conditions. |
Format Action Configuration
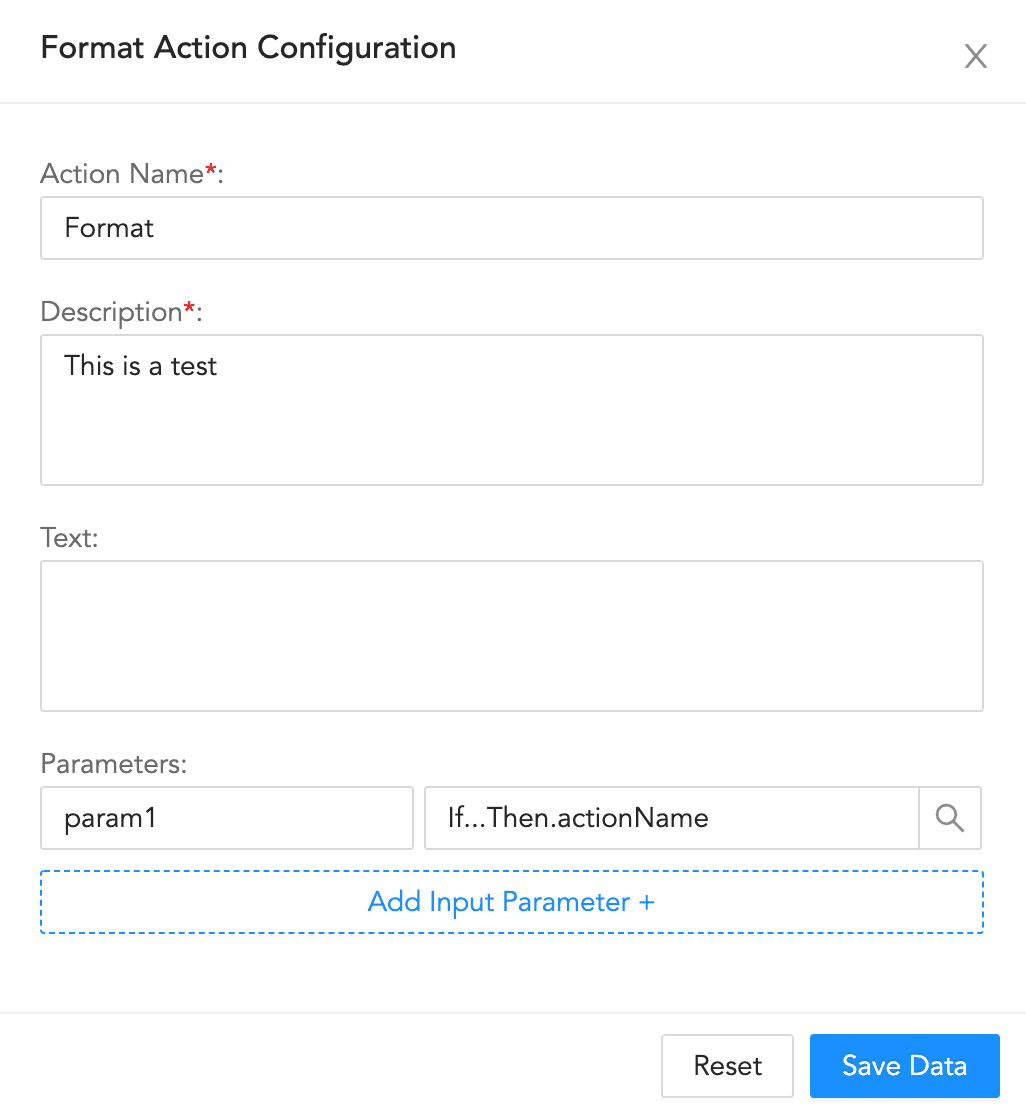
To configure a format block:
Enter an Action Name and its Description.
Enter a Text.
Enter a list of key-value based Parameters.
Click Save Data.
Query Action Configuration
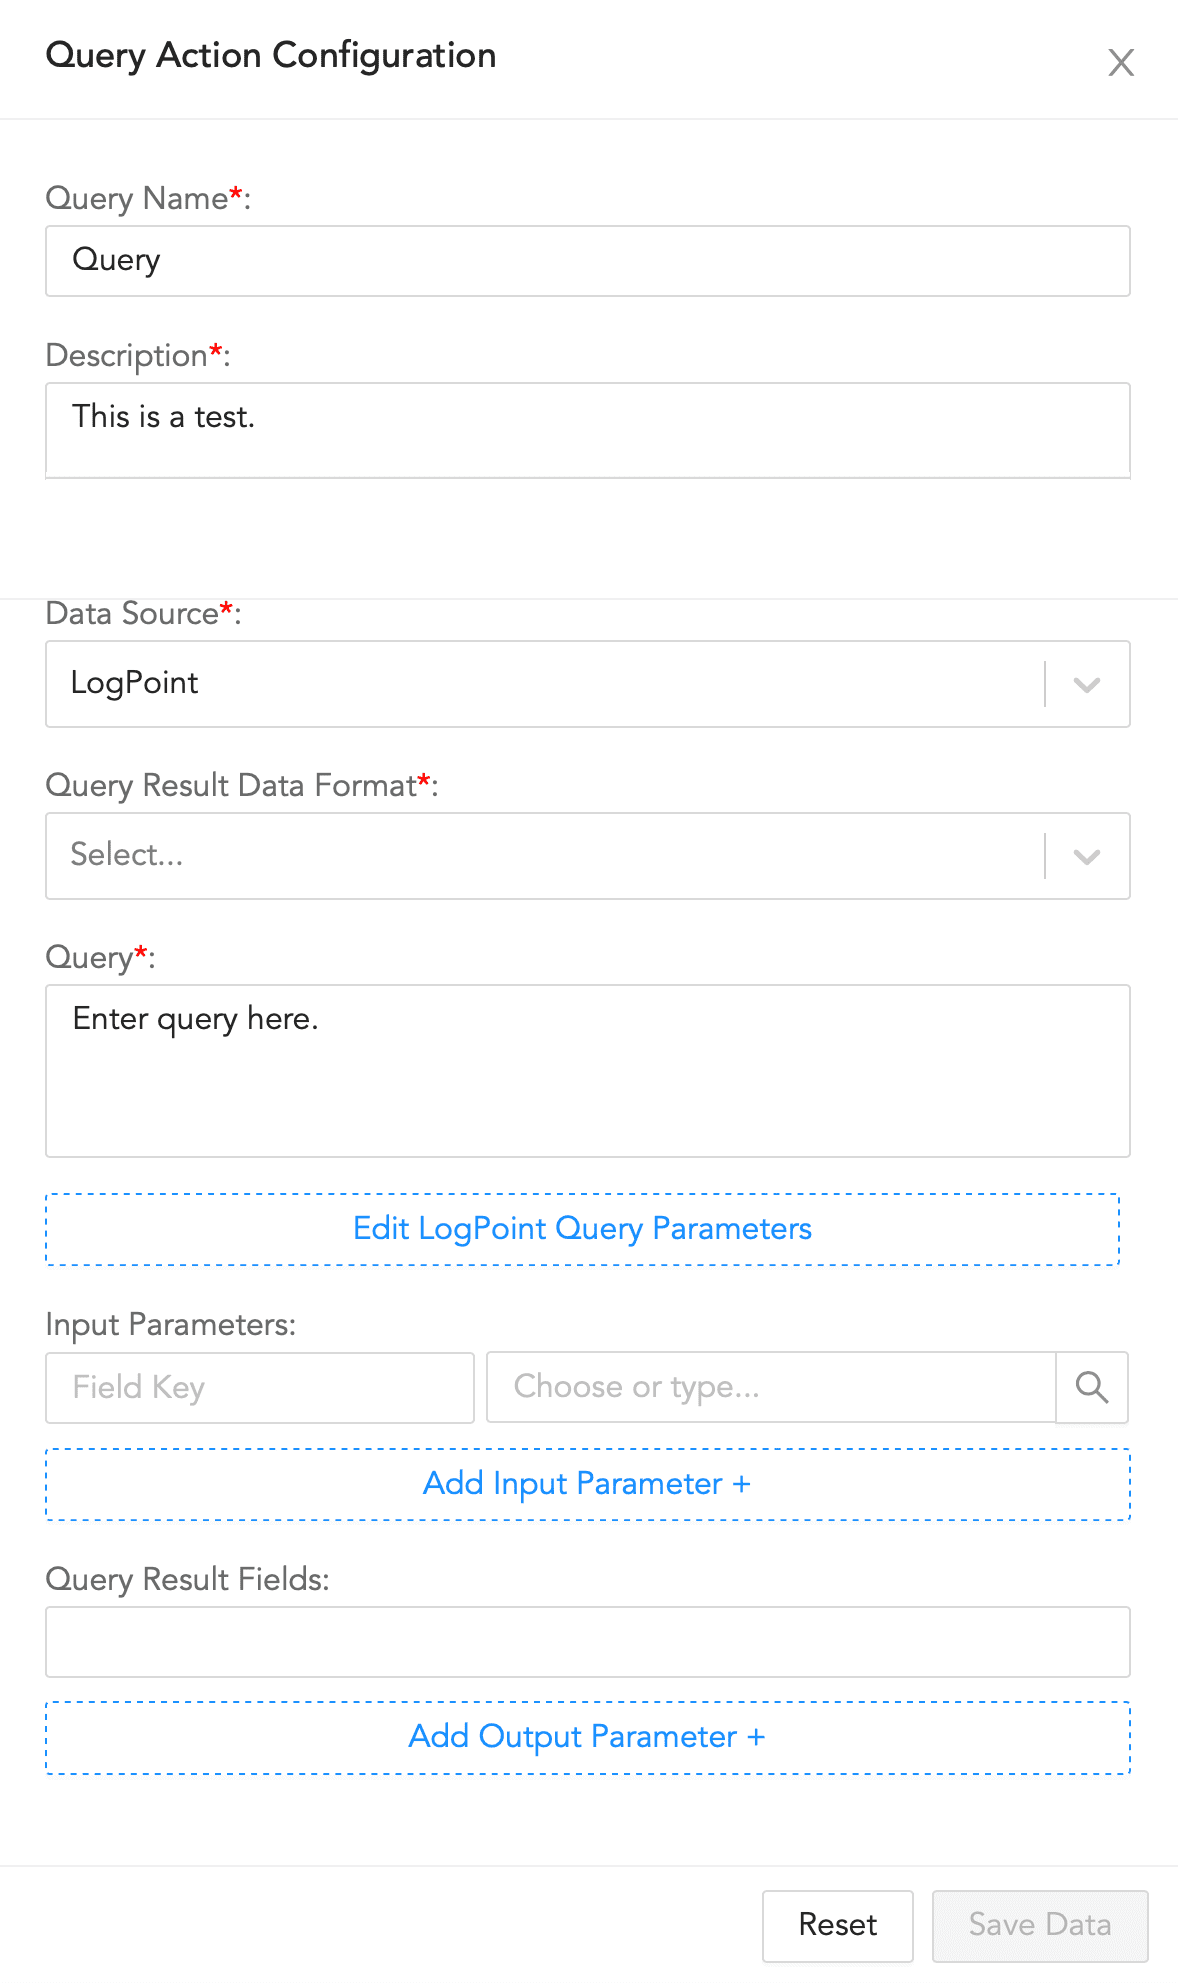
To configure a query block:
Enter a Query Name and its Description.
Select a Data Source and a Query Result Data Format.
Enter a Query to retrieve the required logs.
Click Edit LogPoint Query Parameters to update the parameters.
4.1. Enter a LogPoint Id. The value entered here overrides the value retrieved from the LogPoint incident.
4.2. Select a Time Range and enter a Limit.
4.3. Select a Time-Zone. You can choose between a system set time zone and a custom time zone.
4.4. Enter a list of Repositories.
Enter a list of key-value based Input Parameters.
Enter a list of Query Result Fields.
Click Save Data.
Create new playbooks. Refer to Adding a Playbook.
Run playbooks. Refer to the Running a Playbook.
Monitor the playbooks. Refer to Monitoring Playbooks.
Configure playbook triggers. Refer to Playbook Triggers.
Clone a playbook. Refer to Cloning a Playbook.
Export a playbook. Refer to Exporting a Playbook.
Edit a playbook. Refer to Editing a Playbook.
Delete a playbook. Refer to Deleting a Playbook.